 I am happy to finally release my cross-platform Ambisonic processors useable as VST/LV2 plug-ins or standalone application under Windows, Mac OSX and Linux. They can be used in flexible hosts like Reaper, Ardour, MaxMSP, Bidule or as standalone applications with Jack.
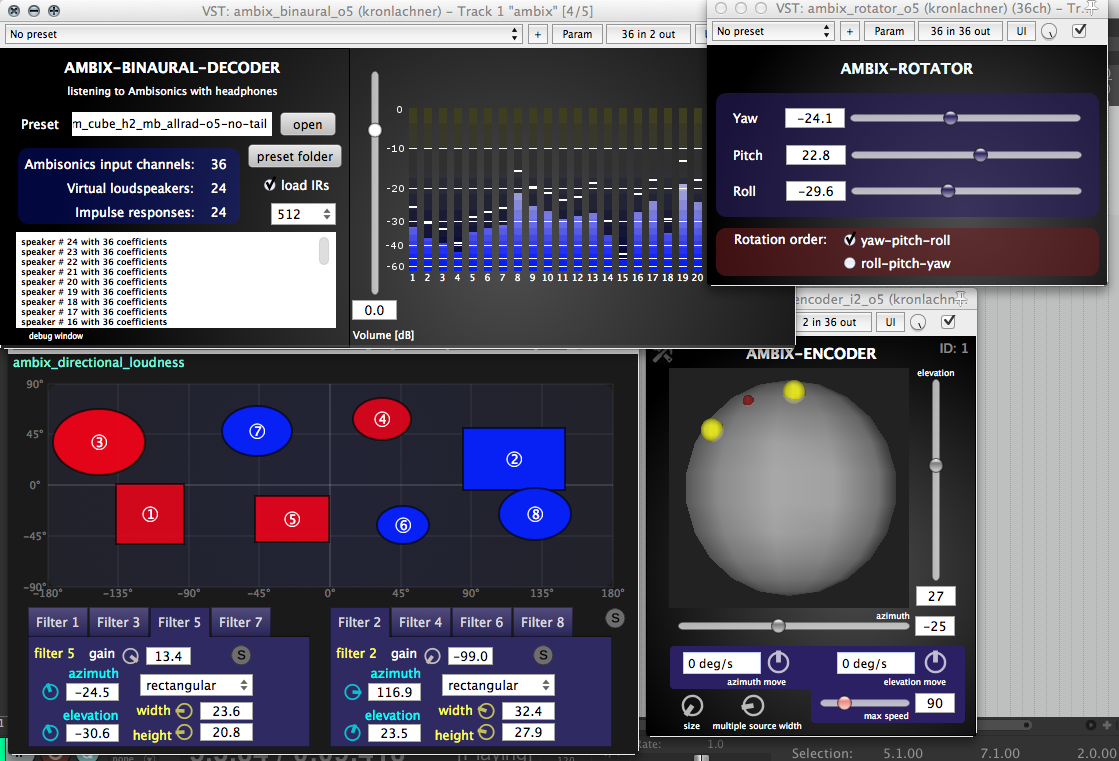
The plug-ins can be used to produce 3D Ambisonic content or do post production on recordings. (eg. Soundfield or Eigenmike® microphone recordings)
The Ambisonic order is variable and can be choosen at compile time. A practical limitation for Reaper is 7th order due to the 64 channel limit. The processors use the ambiX convention (full 3D, ACN channel ordering, SN3D normalization)
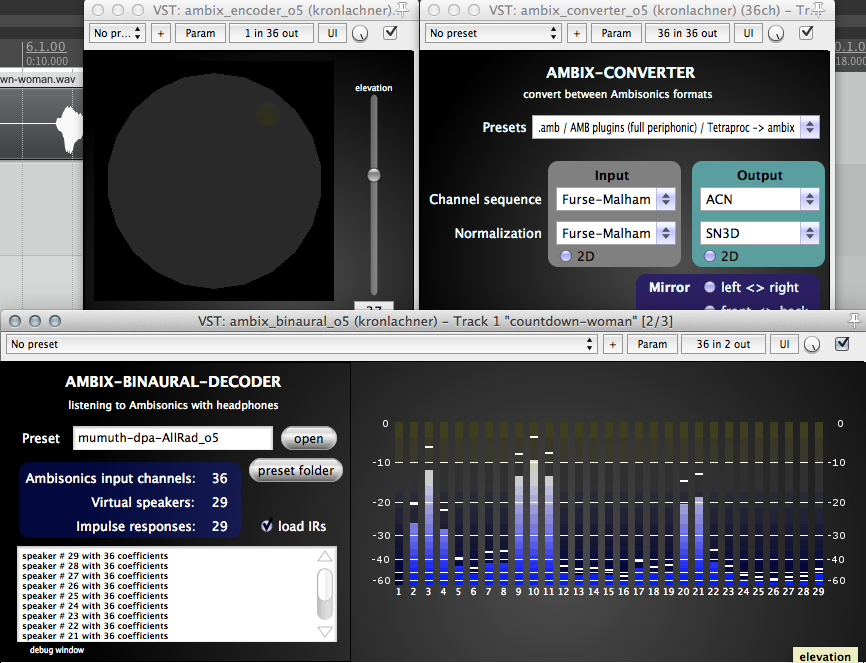 A short video clip showing the plug-ins in action: https://vimeo.com/81073470
You may want to use these plug-ins in combination with the mcfx multichannel effect plug-in suite: https://www.matthiaskronlachner.com/?p=1910
Source code repository: https://github.com/kronihias/ambix
![]()
Download binaries from Github:
https://github.com/kronihias/ambix/releases
![]()
You will also need the binaural decoder presets if you want to listen with headphones:
ambix_binaural_presets_v0.1.5.zip
(download includes decoder matrices + binaural loudspeaker impulse responses)
Some more good presets from the BBC can be downloaded here: https://github.com/bbc/bbcrd-brirs
Install the decoder presets to:
Windows 7/8: C:\Users\username\AppData\Roaming\ambix\binaural_presets\
MacOS: ~/Library/ambix/binaural_presets/
Linux: ~/ambix/binaural_presets/
Currently there is no preset generator included, you have to generate your decoding matrix with other tools. For example with the Ambisonic Decoder Toolbox by Aaron Heller using Matlab/Octave: [Source repo] [LAC Article].
Read this article from the AES Design competition for some informations regarding the plug-ins!
A slightly outdated paper about the plug-ins can be found here: http://lac.linuxaudio.org/2013/papers/51.pdf
Ambisonic transformations are described here ICSA2014_KronlachnerZotter_AmbisonicTransformations.pdf
This software was developed during the work on my master thesis at the Institute of Electronic Music and Acoustic Graz. [ IEM ]